
Turn a Tapestry into a Rug
A tapestry is a beautiful and unique way to add color and style to any room in your home. But did you know that you can also turn a tapestry into a rug? It’s easy to do and only requires a few supplies.
Here’s how: First, measure the area where you want to place the rug. Then, cut a piece of backing material that is slightly larger than the measurement.
Next, lay the backing material on a flat surface and center the tapestry on top of it. Now, using a sewing machine or needle and thread, stitch the two pieces together around all four sides. Be sure to leave enough of an opening so that you can turn the rug right side out when you’re finished.
Finally, trim any excess material from the edges, and voila! You now have a one-of-a-kind tapestry rug for your home.
One of the great things about tapestries is that they can easily be turned into rugs. This can be a great way to add some extra warmth and comfort to your home, especially if you have hardwood floors. Here are a few simple steps to turn your tapestry into a rug:
1. Measure the tapestry and cut it to size. You will want to leave about an inch or two of extra fabric around the edges so that you can hem it. 2. Hem the edges of the tapestry using a sewing machine or needle and thread. Be sure to double-knot the threads so that they don’t come undone over time. 3. Use carpet tape or another strong adhesive to attach the tapestry to the floor. Start in one corner and work your way out, making sure that there are no bubbles or wrinkles in the fabric. 4. Trim any excess fabric from around the edges of the rug, then enjoy your new cozy addition!
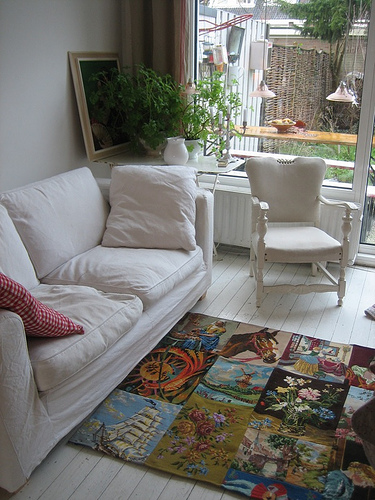
Credit: www.familyholiday.net
Can You Turn Fabric into a Rug?
Yes! You can turn fabric into a rug. All you need is some fabric, a glue gun, and a little bit of patience.
First, cut your fabric into strips. The width of the strips will determine the thickness of your rug, so make them as wide or as thin as you want. Once you have your strips cut, start gluing them together at one end.
To make sure your rug lies flat, alternate the direction of each strip as you glue them together. Once all of your strips are glued together, start wrapping them around themselves in a spiral pattern. When you get to the end, tuck the loose end under another strip and glue it in place.
And that’s it! Your new rug is ready to use.
Is Tapestry the Same As a Rug?
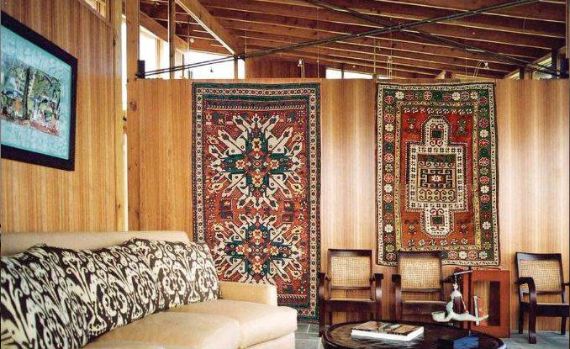
Tapestry and rugs are often confused because they are both floor coverings. However, there are some key differences between the two. Tapestries are usually larger than rugs and are meant to be hung on a wall.
They often have intricate designs and are made from thin, delicate fabrics like silk or wool. Tapestries can be used as a form of art or as insulation against cold walls. Rugs, on the other hand, are smaller and meant to be placed on the floor.
They are usually made from thicker materials like wool or cotton and have more sturdy construction. Rugs can also have intricate designs, but they tend to be simpler than tapestries.
Can You Use Modge Podge As a Rug Backing?
No, you cannot use Modge Podge as a rug backing. While it is a decoupage glue that can be used for various crafts, it is not made to be used as a rug backing. There are other products on the market that are specifically designed for this purpose and will work better than Modge Podge.
How Do You Make a No-Sew Rug Out of Fabric?
If you’re looking for a quick and easy way to add a splash of color or pattern to your home, a no-sew rug made out of fabric is the perfect solution! You can make one in any size or shape that you want, and there’s no sewing required – just some basic cutting and gluing. Here’s how to do it:
1. Choose your fabric. Any type of lightweight fabric will work well for this project, so feel free to get creative with the pattern and color. Keep in mind that the finished rug will be slightly smaller than the piece of fabric you start with, so allow for 1-2 inches of shrinkage when selecting your size.
2. Cut the fabric into strips. Using a sharp pair of scissors, cut the fabric into strips that are about 1-2 inches wide. The length of each strip will depend on the size of the rug you’re making – aim for around 8-10 feet long if you’re planning on making a small accent rug, or 12-15 feet long for a larger one.
3. Glue the strips together. Apply a line of craft glue along one edge of each strip, then lay them side by side until all strips are glued together at their edges (you should now have one long strip). Allow the glue to dry completely before proceeding to the next step.
4. Make loops with the strip. To create loops out of the strip, simply fold them in half lengthwise (so that the wrong sides are facing) and glue or stitch them together along the open edge; repeat this process until you have as many loops as desired (again, depending on rug size). Make sure to leave about 6 inches unglued/unstitched at either end so that you can attach these later on.
5. For an alternative method: braid three strips together tightly, then coil into a spiral and hot glue or sew down the end under the bottom layer; continue braiding additional strips and adding onto the spiral until the desired size is reached (again leaving about 6 inches unglued at either end. Another alternative method: knot two strips together loosely about every inch; continue knotting additional strips onto the first two until the desired size is reached (leaving about 6 inches unknotted at either end
6. Attach ends together. Once all loops are made (or spiral/knots complete), take those 6-inch unglued/unstitched sections from earlier and overlap them so that the wrong sides are touching; glue or stitch these sections together to close up the Rug base looped/braided/knotted design completely. Trim any excess fabric if necessary.
7. Add fringe (optional). For an extra touch, add some fringe around the edges of your rug – simply cut thin strips of Fabric, fray their edges slightly, then glue or stitch them evenly spaced around the Rug perimeter. Let dry completely before using.
Easy DIY Fabric Rug | Sew This Bedroom | Hobby Lobby®
How to Make a Rug Out of Fabric No-Sew
Making a rug out of fabric is a simple and fun project that anyone can do, regardless of their sewing skills. All you need is some fabric, scissors, and a little bit of time. The first step is to cut your fabric into strips.
You can make them as wide or as narrow as you like, but keep in mind that wider strips will result in a thicker rug. Once you have your strips cut, tie them together at one end using a knot or piece of string. Now it’s time to start braiding!
The most important part of this step is to be consistent with the tension on each strip of fabric. If one strip is pulled too tight, the whole braid will be uneven. Take your time and make sure each strip is the same tension before moving on.
Once you’ve reached the end of the fabric strips, tie off the braid with another knot or piece of string. Trim any loose threads and admire your handiwork!
Conclusion
This blog post shows how to turn a tapestry into a rug. It is a simple process that requires only a few supplies. First, you will need to purchase or find a tapestry.
Next, you will need to measure the tapestry and cut it to size. Once the tapestry is cut, you will need to sew it onto a backing fabric. Finally, you will need to add fringe or tassels to the edges of the rug.


